This article explains how to configure OpenVPN on pfSense as well as some hints for the client. We’re using version 2.3.2 (the current version is 2.3.3_1).
OpenVPN is one of (if not the) best VPN’s available. This is according to the “Snowden” documents.
Log into the pfSense portal. Notice the menu across the top of the page. We’ll be using two tabs. The “System” and “VPN”.
We’ll start by creating a certificate that will be needed later on. It’s easiest to do this first:
The following are the settings and the values you should set. Some settings are examples and should be replaced with your specific settings.
Note: My comments follow the “//” symbols.
Click System, Cert. Manager. // You will be in the "CAs" tab.
Click Add.
Descriptive name: MyCertificateCA // Anything you like.
Method: Create an Internal Certificate Authority
Key length (bits): 2048
Digest Algorithm: sha256
Country Code: AU // Your country code
State or Province: South Australia // Your state
City: // Your city name
Organisation: // Your org name
Organizational Unit: IT Department
Email address: [email protected]
Common-name: internal-ca
Note: You can create yourself a Server Certificate by clicking the “Certificates” tab or you can use the default. In this tutorial, we’ll be using the default certificate to keep it simple.
Now we’ll configure the VPN server.
Click VPN, OpenVPN.
Click the Add.
This is where you set up the VPN server. You’re asked to fill in plenty of settings. Don’t be intimidated by this. Most require no changes.
The “General Information” section:
Disabled: Unchecked
Server mode: Remote Access (SSL/TLS + User Auth) // This means the client needs a certificate as well as credentials.
Backend for authentication: Local Database // We'll create users & passwords on the pfSense later on.
Protocol: UDP
Device mode: Tun
Interface: Any
Local port: 1194
Description: // Anything you like
TIP: You can change the “Backend for authentication” to anything you’ve configured in the “System, User Manager, Authentication Servers” section. You have the options of LDAP and RADIUS. These are good options if you want to use Single Sign-On. In this article we’re keeping it simple using the internal user database.
The “Cryptographic Settings” section:
TLS authentication:
-> Enable authentication of TLS packet: Checked
-> Automatically generate a shared TLS authentication key: Checked
Peer Certificate Authority: MyCertificateCA // Or whatever you called your certificate in the steps above
Server certificate: webConfigurator default
DH Parameter length (bits): 2048
Encryption Algorithm: AES-256-CBC (256 bit)
Auth digest algorithm: Sha1 (160 bit)
Hardware Crypto: No hardware Crypto Acceleration
Certificate Depth: One (Client+Server)
Strict User-CN Matching: Unchecked
The “Tunnel Settings” section:
IPv4 Tunnel Network: 172.16.15.0/24 // Or whatever range you're happy with
IPv6 Tunnel Network: // Blank
Redirect Gateway: Unchecked
IPv4 Local network(s): 192.168.1.0/24 // Change this to be the Internal network that remote users will access
IPv6 Local network(s): // Blank
Concurrent connections: // Blank
Compression: No preference
Type-of-Service: Unchecked
Inter-client communication: Unchecked
Duplicate Connection: Unchecked
Disable IPv6: Unchecked // Although you can disable this
The “Client Settings” section:
Dynamic IP: Checked
Address Pool: Checked
Topology: Subnet -- One IP per client
The “Advanced Client Settings” section:
DNS Default Domain: Checked
DNS Default Domain: example.com // Your org domain name
DNS Server enable: Checked
DNS Server 1: 192.168.0.10 // The IP of your internal DNS server
Force DNS cache update: Unchecked
NTP Server enable: Unchecked
NetBIOS enable: Checked
Node Type: None
Scope ID: // Blank
WINS server enable: Unchecked // Or you can set this to your internal WINS server IP
Enable custom port: Unchecked
The “Advanced Configuration” section:
Custom options: // Blank
Verbosity level: Default
The server is configured. Now you need to configure the user accounts.
Click System, User Manager
TIP: The process that follows explains how to create a user. The user (or staff member) is one person that will be using the VPN. Do these steps (that follow) for each person that will be using the VPN.
The “User Properties” section:
Disabled: Unchecked // Check this if you want this user to be disabled until later when you'll manually un-disable (enable) it.
Username: myUser // Or any username as appropriate
Password: myPassword // Set a good password
Full name: My User Name // Set the users first and last name
Expiration date: // Blank or click in the field and select a date
Custom Settings: // Blank
Group membership: // Blank
Certificate: Checked
The “Create Certificate for User” section:
Descriptive name: MyUser Cert // Something descriptive of who uses this certificate
Certificate authority: // Select the certificate that you created earlier
Key length: 2048
Lifetime: 3650
The “Keys” section needs no changes.
The VPN client on the workstations that will be connecting to your VPN server will need packages (the config file and certificate files) in order to connect. Therefor those who connect will need both the certificate files and the user credentials. We’ll go through this process now.
Click VPN, OpenVPN
Click the Client Export tab
This page has to sections; the settings and the users. First we’ll make sure the settings are correct and then we’ll set those settings as the default so we don’t have to do this each time we export certificate packages. Second we’ll export the packages for each user.
The “OpenVPN Server” section:
Remote Access Server: Server UDP:1194
Host Name Resolution: Interface IP Address
Block Outside DNS: Unchecked
Use Random Local Port: Checked
The “Certificate Export Options” section:
All Unchecked
The “Proxy Options” section:
All Unchecked
The “Advanced” section:
Empty
Click the “Set as Default” button to make the above settings the default.
Each user that you setup earlier will be listed in this section (the bottom of the page). Each user will have a list of buttons to their right hand side. These buttons (when clicked) will download a file.
TIP: You will need to download OpenVPN client software. I recommend “Viscosity” from “https://www.sparklabs.com/viscosity/download/“. It comes with a cost (small cost) and isn’t very aesthetically pleasing but it works fine on both MacOS and Windows 10.
The remainder of this article are my suggestions. My suggestions are based on Viscosity software.
For both Windows and MacOS:
In the "Viscosity (Mac OS X and Windows):" section
Click "Viscosity Bundle"
Extract (unzip) the bundle and put the files in a nice place on your workstation (client). You’ll need these files for future use of the software so don’t lose them. You can always re-download them if you do lose them.
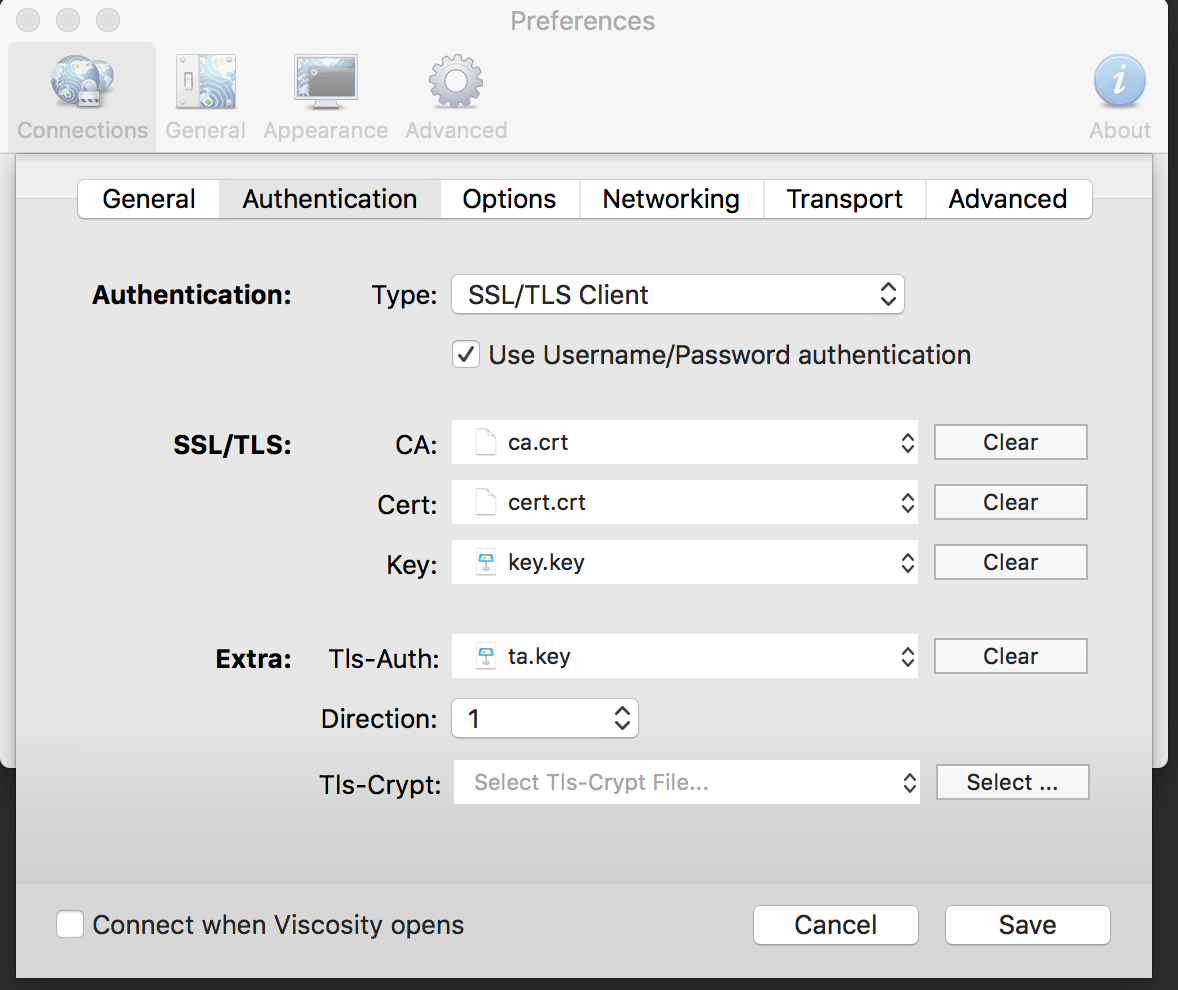
Install and open the Viscosity software and drag’n’drop the configuration file onto the Viscosity window. Right click on the configuration entry and click Edit. You will need to enter the certificate files as the screenshots that follow show:
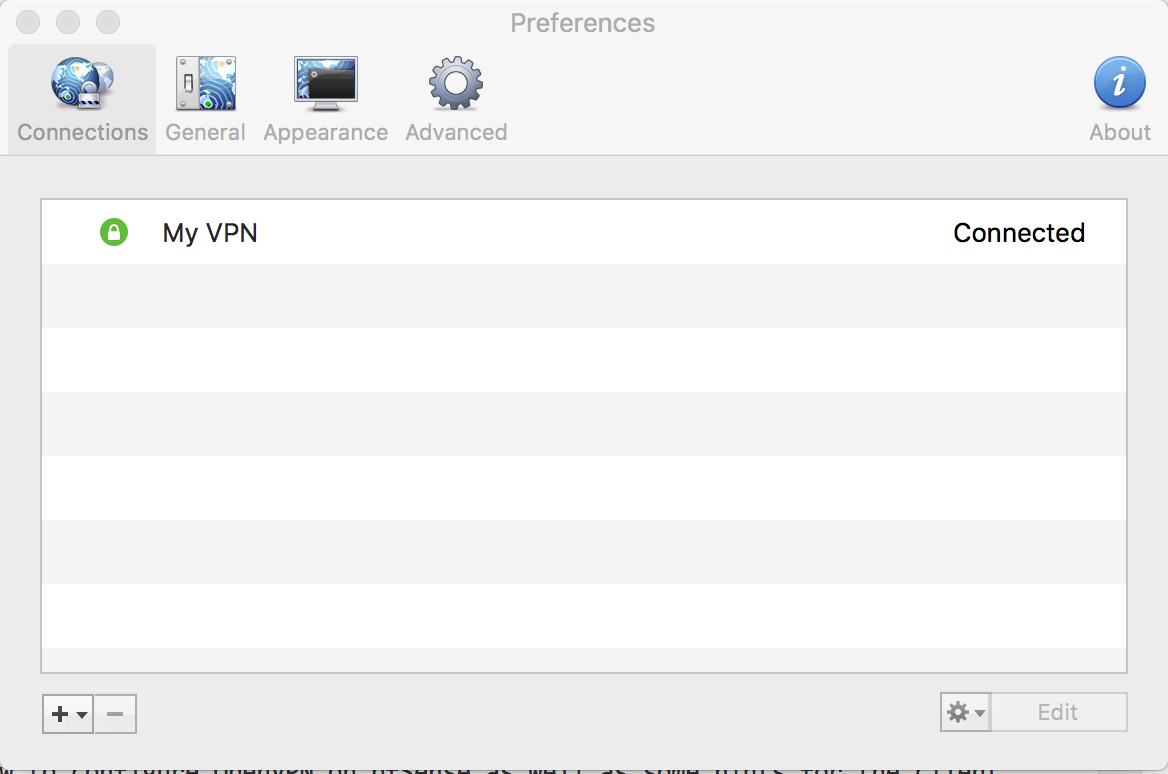
The Viscosity Main window:
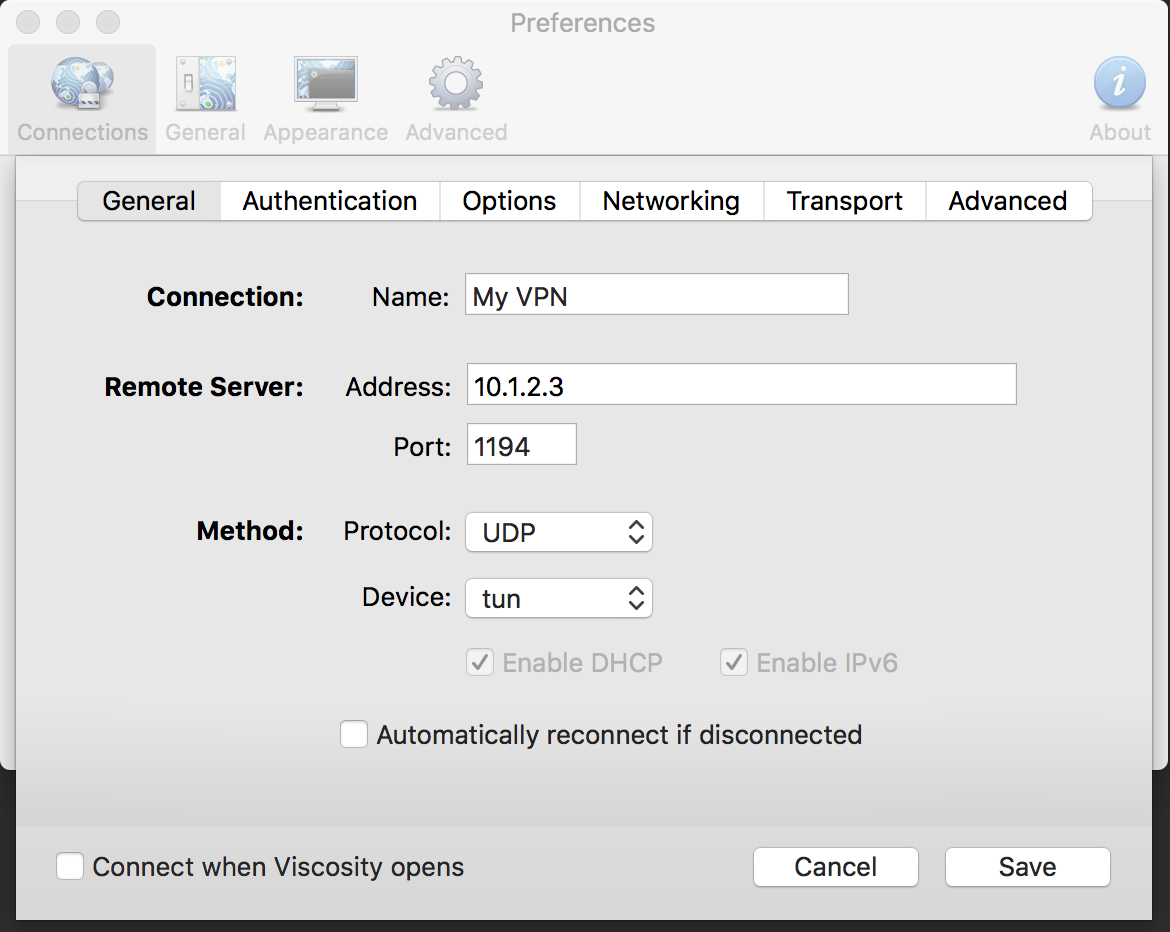
The Viscosity Settings window:
The Viscosity Certificate window: