Keeping your Mac up to date is no less important than any other system. Despite popular belief, MacOS should be considered just as susceptible to malware as any other operating system. One might argue that MacOS is based on BSD/Linux and therefore inherently more secure but just because one operating system “might” be more secure than another (who really knows), doesn’t mean that it “is” secure. They all suffer imperfections and must be judged on that basis.
Table of Contents
Antivirus

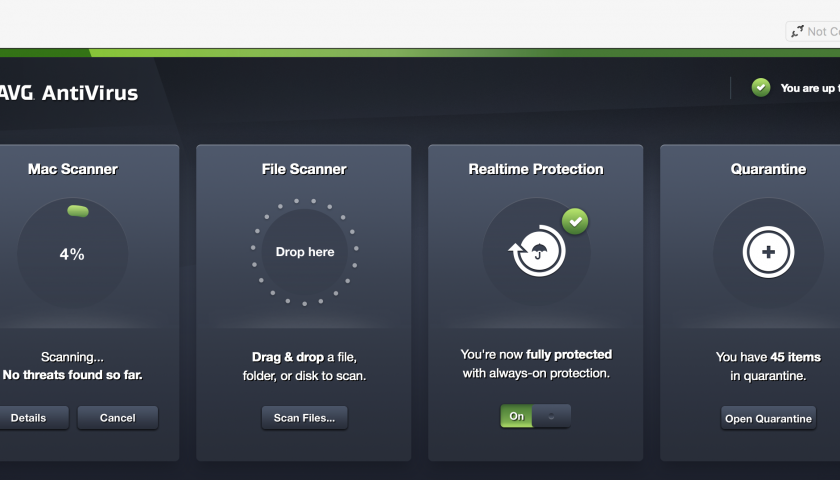
In the old days (in the past few years) antivirus on MacOS has been a drain on the battery power but with the move to solid state hard disks and improved AV engines, it’s hardly noticeable to run AV on a Mac. I recommend AVG for MacOS. It keeps its self up to date which is a nice comfort.
Firewall
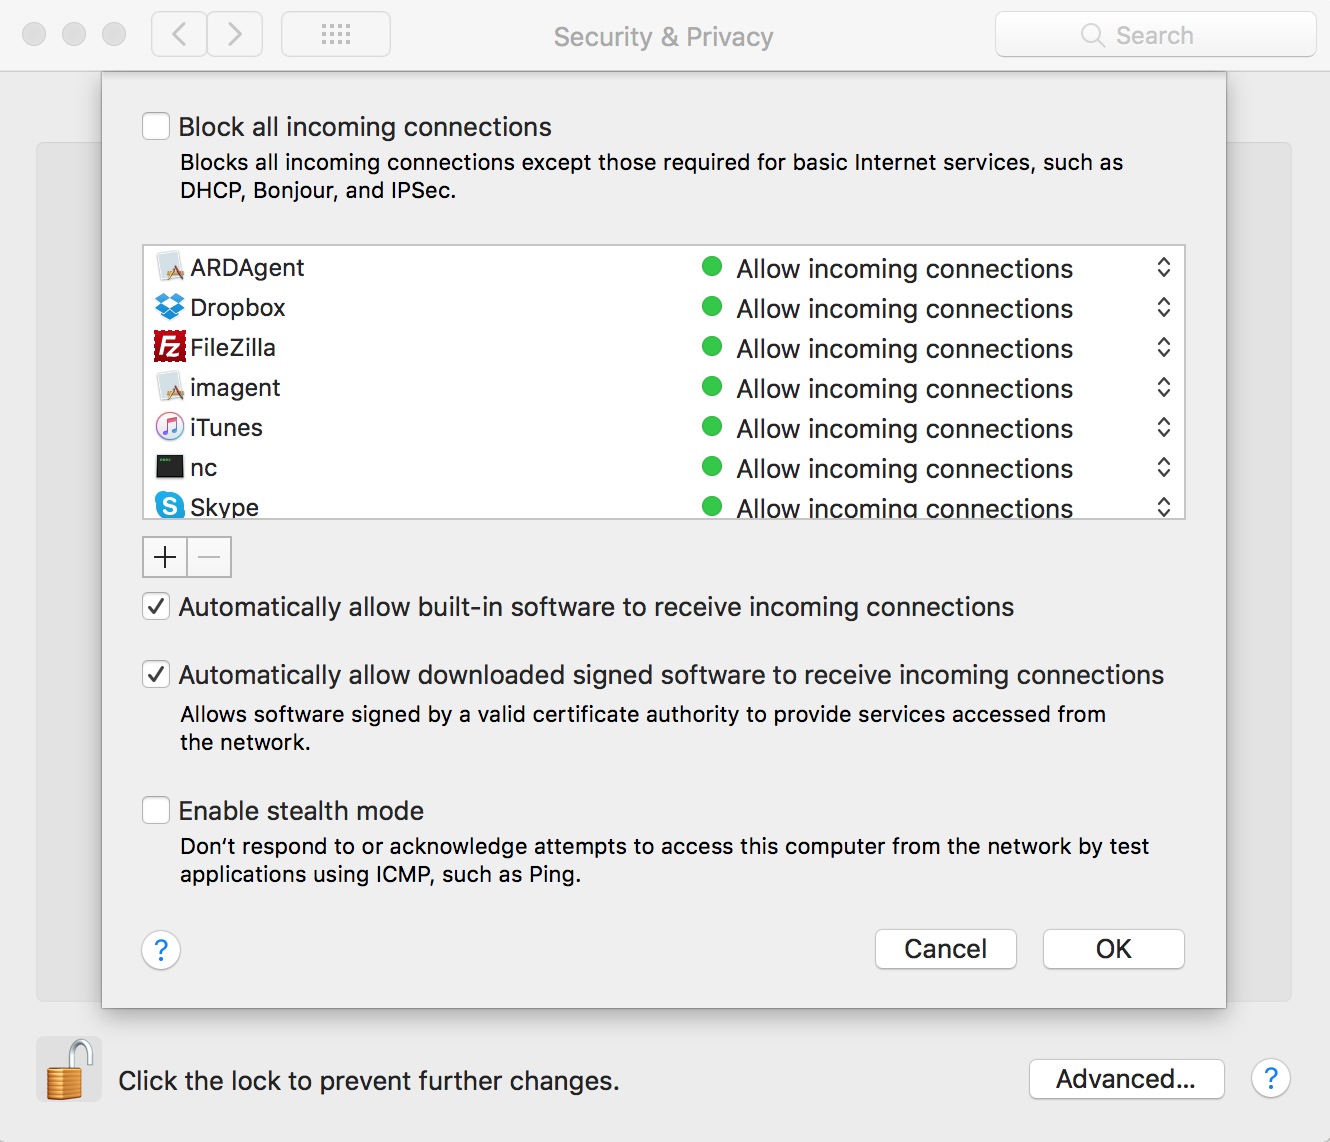
MacOS has a simple to configure firewall. Go to “System Preferences” and “Security & Privacy”. Finally select the “Firewall” Tab. You’ll need Admin rights to your workstation to make changes (including activating and deactivating) the firewall.
Backups
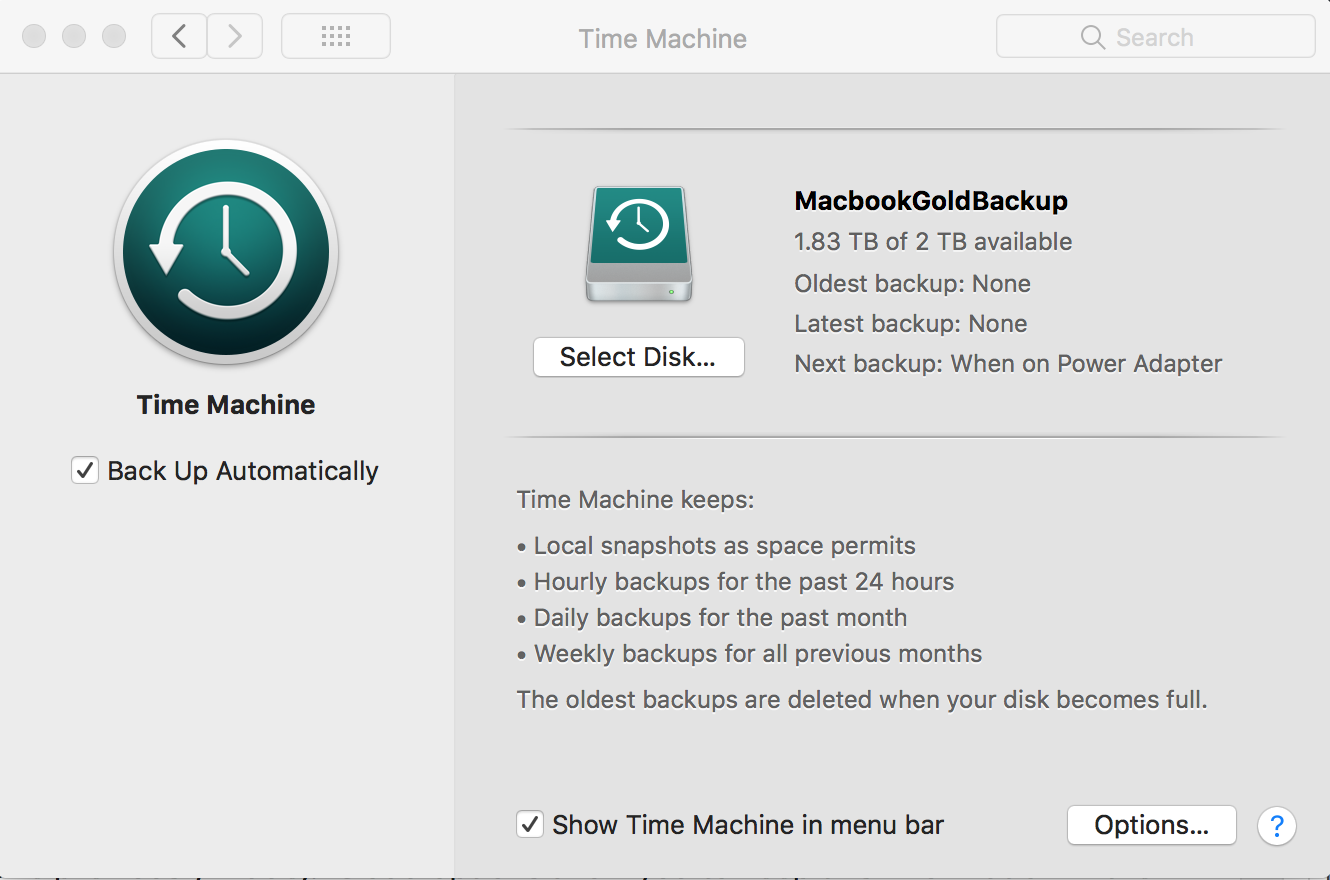
These days a good chunk of your important information is stored in the cloud such as your emails, contacts, calendars and possibly your documents and photos (depending on choices you’ve previously made). iCloud options allow you to keep this information in the cloud allowing you to sync information between devices. I will acknowledge privacy concerns here but leave that for another article. The remainder of your information should be included in more traditional backups. MacOS comes with the “Time Machine” backup service. It’s essentially a backup client that will copy your files to another location allowing for multiple versions to be stored for easy access later on. Go to “System Preferences” and then “Time Machine”. You will see the options for where to store the backups and what (if anything) you want excluded from backups. You can’t specify “when” backups happen though. If you have a “Time Capsule” device on your network, you will be able to easily configure your workstation to backup to that which is advised as they all work together nicely. According to “https://support.apple.com/kb/PH25615?locale=en_US”, you can encrypt the backups (although it’s not a simple process) which is a smart step.
Software Updates

The MacOS operating System and installed applications can be updated in the same location. This is only true for software installed via the app store. Other software must be updated using its own updater. Fortunately most applications check for updates and apply them regularly. For example, Firefox has its own updater and it works very well. To use the system updater, click on the “Apple” icon at the top/left of the screen and then “About This Mac”. Then click the “Software Update” button. It will list all available updates. Check here regularly and make sure updates have been applied. It’s important to note that updates only work when the software they’re replacing restarts so it’s a good idea to reboot after updates are applied.
Disk Encryption
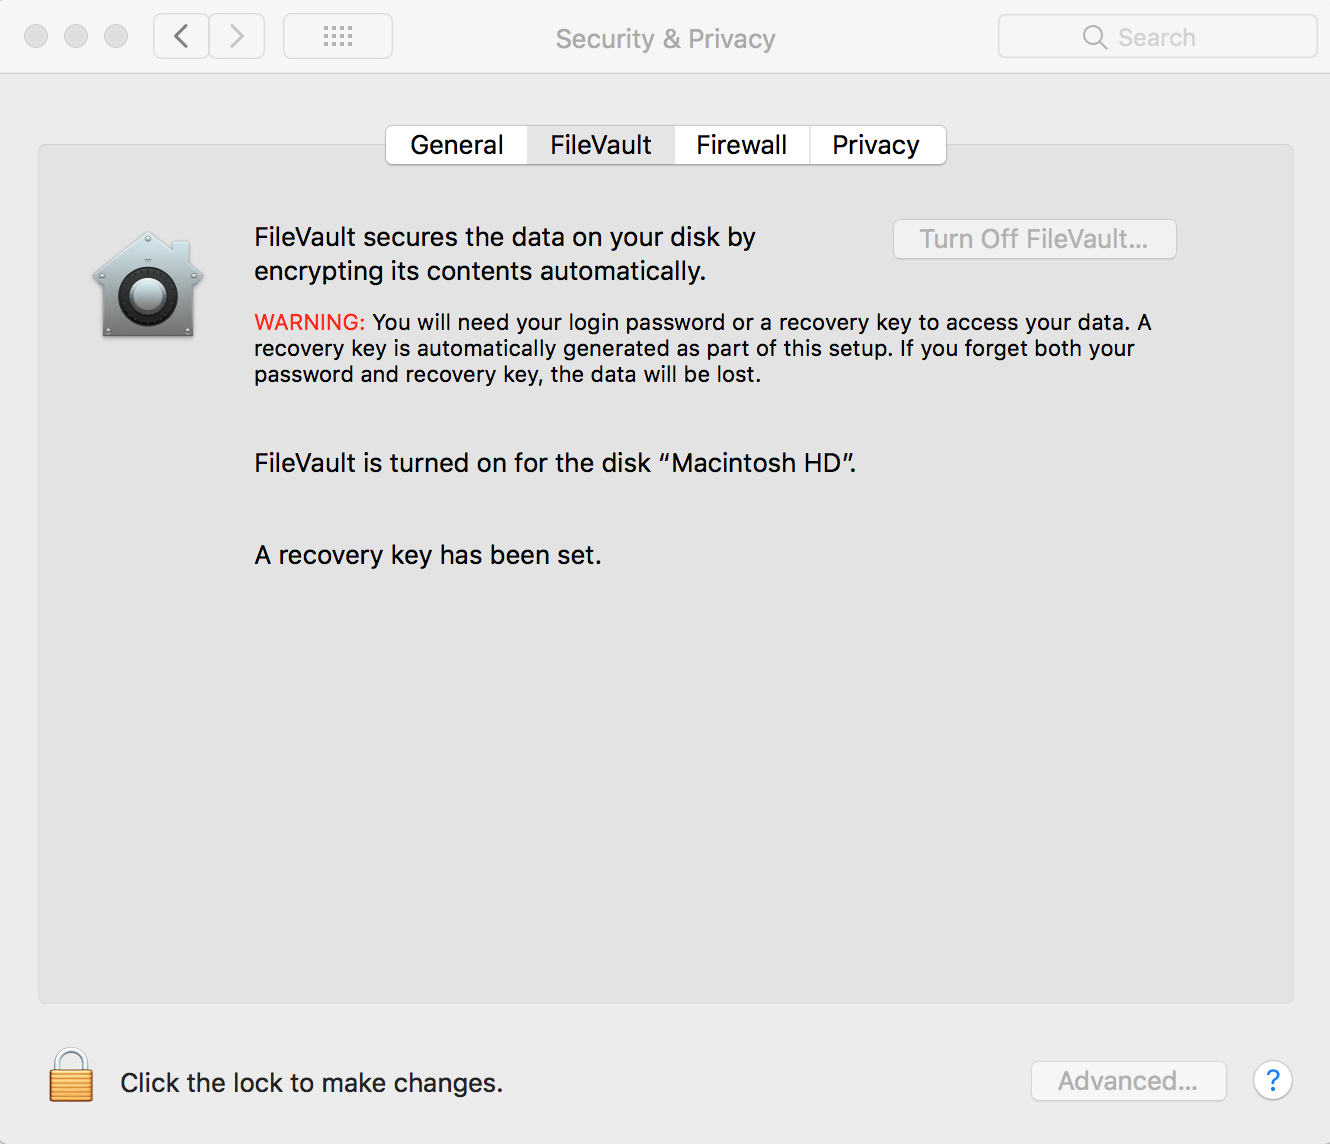
MacOS has allows you to encrypt your entire hard disk so that if lost, the finder would have to enter your password to see the contents of your disk. They can’t simply remove the disk and then examine it that way – which would be possible if the disk was not encrypted. For the technical people “It uses the AES-XTS mode of AES with 128 bit blocks and a 256 bit key to encrypt the disk” according to Wikipedia. You can enable disk encryption at any time. Go to “System Preferences” and then “Security & Privacy” and finally “Filevault”. Click “Turn on FileVault”.
Further Tips
I want to finish this article by stressing the need to make smart and informed decisions about the use of your Mac. Be careful about what you install and make sure you uninstall anything you no longer need. Be careful about websites that you visit and emails that you open. Sharing files (torrents) is one avenue into your computer so taking care and limiting this activity is smart. Couple these tips with the key points in this article to be sure you’ve made a positive start to securing your MacOS workstation.
